
Continuing work on the Model T van. The kit includes adhesive backed micro wood to simulate the parts that were wood on the real van. Since I have two kits, I have some excess. One of the kits had the pieces pre-cut and the other was not cut but had a printed pattern. So, I basically had the proper amount I need but with some extra wood to use otherwise. I wanted the option to add more wood where it was lacking and have some extra in case of disaster, so I bought two sheets of adhesive backed wood veneer from eBay. One was likely more than enough, but why pay for shipping twice? This is also a good material to have in my stash for other projects as well.

I like to talk in correct terminology, but as of writing this post I am still trying to figure out which parts are which…so bear with me. The original kit fire wall has the wood on the outside (like the original auto). There is no wood piece for the interior, though you can certainly paint the simulation. I used the pre-cut wood for the exterior fire wall. I finished all of the micro wood pieces in Minwax Cherry with Delta Ceramcoat gloss varnish. The cherry is a warm finish without being too dark. I painted the raised details gloss black since there would not have been a way to get matching brass accents.
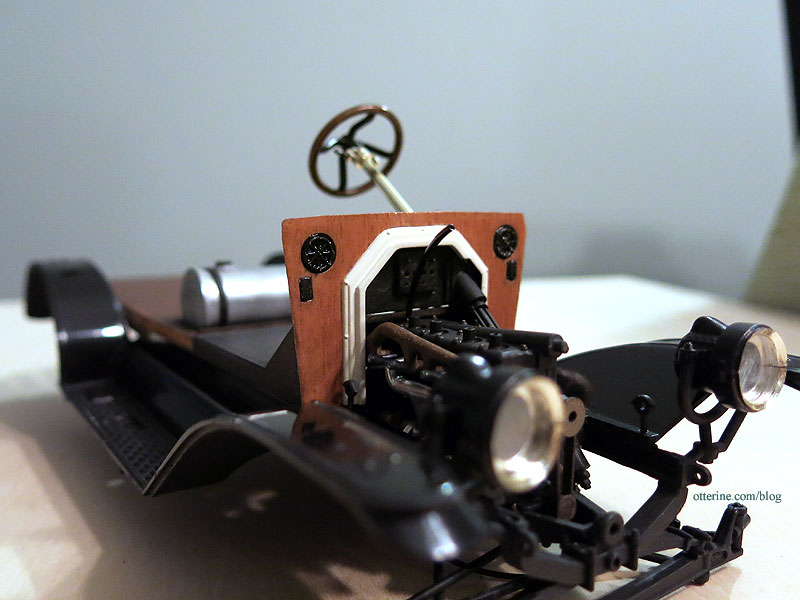
Unlike the real auto, the kit dash is molded in two pieces. The front piece has the coil box molded in place. I’ve seen these boxes in wood (with dovetail joints) and black. As a compromise, I painted the front dash piece black in its entirety since masking would have been difficult. I cut micro wood for the back dash piece. I masked the front cabin floor and sprayed it flat black. After the paint dried, I dry brushed some browns and greys to add some weathering to make it seem like a separate mat. The speedometer was molded in brass, and I added black to the face to make the details stand out.

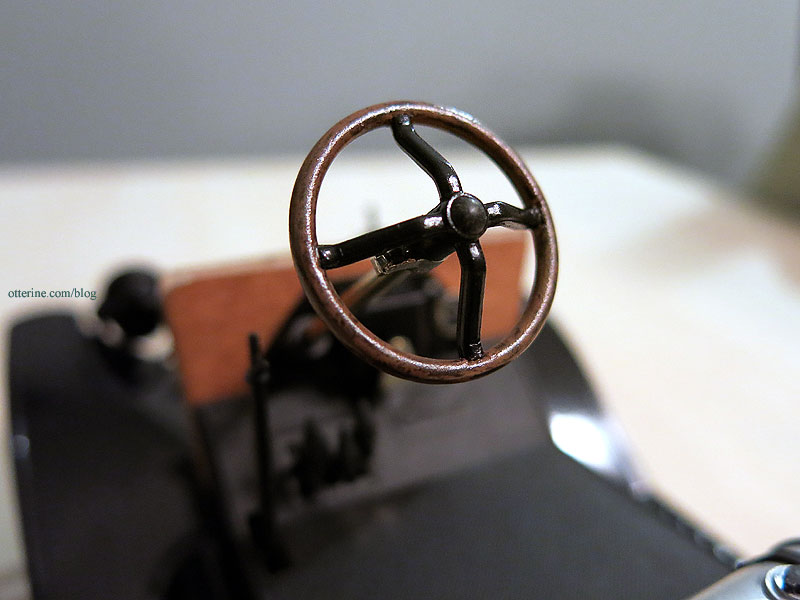
I painted a faux wood finish to the steering wheel.
I painted the wood grain portions of the floor board with Krylon Brown Boots satin spray paint. I used acrylic washes to accent the grain and add weathering.

I showed the ga tank in a previous post, but now it’s time to install it. The kit didn’t come with the straps, so I’ve fashioned those from paper. This great video details how to check the gas level (no dash indicator) and the oil (no built-in dipstick). :D The video shows a later model than what I am building, so there’s a lot less wood on it.

The bottom has darker washes from road exposure. I haven’t yet aged the bottom of the gas tank.

Looks like we’re getting somewhere! :D


