Button bird bag, part 1
Been a long time since I posted on the sewing side of my blog. :O
I've mentioned before that I attend a nearby Renaissance Faire every summer. I've purchased a few items over the past year, but I've been itching to make something again. I'm not in for making a garment that's historically accurate, though. I've made those in the past. This time, I just want some comfortable (a relative term) faire wear. :D
I've been sorting patterns and fabrics, and I'll detail what I'm working on for the ensemble. In the meantime, I'm starting a fun project that's a good crossover piece. It's McCall's 7914, an accessories pattern for decorated handbags.
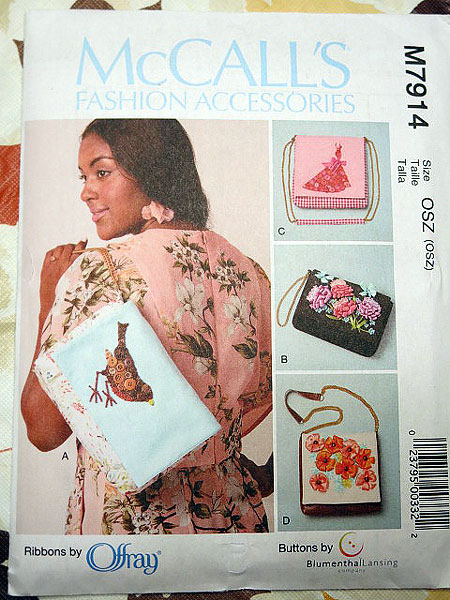
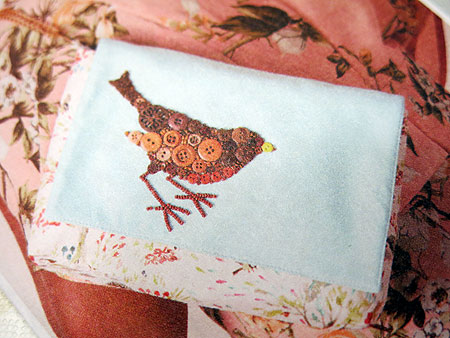
I was drawn to the bird bag, because it's rustic and easily translated into a less modern design for faire. It's a larger bag than I need, but the bird doesn't take up the whole flap so there's room to reduce the width. I need it to hold my ID, monies, phone, keys, tissues and maybe a makeup compact. Here's a detail of the bird.
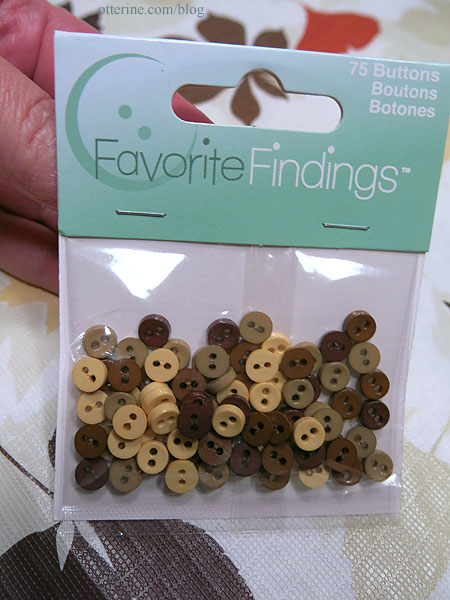
Even though I hadn't read the pattern envelope yet, the buttons recommended and shown on the pattern are the very company who made the packages I bought! :D These are for contrast detailing.
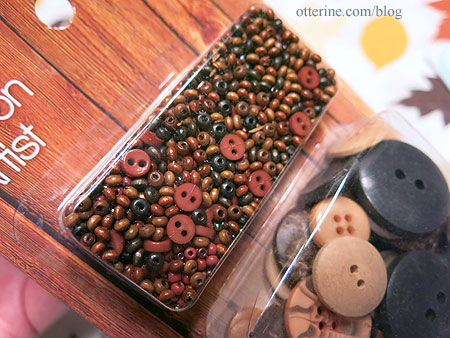
And, these are for the main button and beadwork. According to the instructions, you are to glue the buttons and beads in place. I don't trust that for longevity, so I will be sewing my embellishments in place.
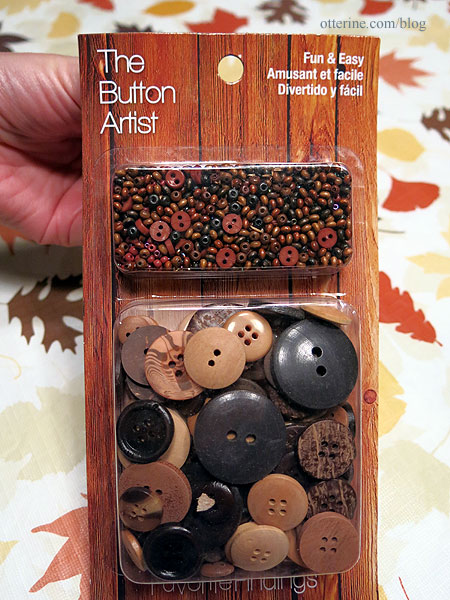
I saw these once before and thought, "How great to have the beads and buttons already coordinated for you in one package, but I have no reason to buy these." hahaha
I bought a remnant of this upholstery linen for cheap and washed it even though it recommended professional cleaning. This is so I can wash the bag as needed in the future. If I were using the fabric for upholstery as it was intended, I wouldn't have washed it. Washing linen tends to wrinkle it mercilessly, but a good ironing fixes that.
I will likely use this linen for the flap with the bird for good contrast and make the main bag brown. I have some remnants in my stash that will work well. First up is a quick muslin for sizing and a trial run on construction. I don't want to do all that work just to find I would have preferred other unforeseen changes. For the mockup, I'll make it true to pattern size.
Stay tuned....
The Teardrop Peacock Dress
For my holiday party dress this year, I went with something different. The outer fabric is a three-dimensional fabric on a mesh base. It's SUEDEsays teardrop embroidered sequins ivory and peacock blue fabric from Joann. The under dress is a matching dull satin.
The pattern is Simplicity 1606. This was my first time using an Amazing Fit pattern, and I must say I rather liked it. The side seams have a 1" seam allowance, so you can let out (or take in further) as needed during the fitting stage.

I used muslin for the bodice first, planning to use those pieces for the bodice lining. I cut a size 4 at the bust line, fanning out to a 12 at the waist. I find sewing pattern bodices to be too low for my tastes more often than not, so I used the size 12 cutting line along the top of the bodice. I cut the 12 for the skirt portion from the final ivory satin for fitting with the muslin since I knew the skirt would be fine at the hips and need minor adjusting at the waist if at all.
The basting and fitting does add time to construction, but the goal is a perfect fit not fast assembly. I ended up letting a little out of the 1" side seam at the top and kept the waist measurement as is.
The challenge for this dress was the outer fabric I chose. It has what amounts to a border print edge. I wanted the scalloped edge along the bottom of the skirt, but the pattern piece has a curve along the lower edge. I folded the teardrop fabric and pinned as you would a plaid, matching the elements to get a symmetrical layout. I pinned the pattern piece to the fabric but then cut wide large panels, keeping the full scalloped edge. Unfortunately, I didn't think to take photos since I wasn't sure it would even work. :\
I pinned the satin skirt panels to my dressmaker's model and then draped the teardrop fabric to fit. I've never formally learned to drape, but I understand the basics of fabric. I pinned huge darts into the skirt panels and removed the excess fabric from the side and waistline. I sewed the darts and cut away to 3/8" seams along them since the fabric was partially sheer.
The mesh base doesn't fray, so I cut along the scalloped edge without needing a sewn hem. I hemmed the satin under skirt so it would not show. Since the satin under skirt is fuller than the outer skirt, it acts like a crinoline and holds the skirt out. A happy accident. :D
I sewed the muslin bodice (with the boning) and the satin bodice and pinned it to the model so I could plan the teardrop placement. I reversed the teardrop direction, because it just seemed a better aesthetic. I didn't bother with a fitting of these pieces, just used the same seam allowances I had for the bodice pieces. I used ivory bias tape to finish the neck and armhole edges.
Unlike the directions indicated, I sewed a 22" zipper from the bottom to the top. The over fabric was strong enough, but I did have to sew the zipper in two sessions. I pinned the zipper in place, and then sewed from the top in as much as the fabric would allow on both sides. I then opened the basting and the zipper to allow more room to sew the lower portion of the zipper. There is also a hook and eye at the neckline.
In the end, it was just a little snug at the bust line but not uncomfortably so. If I make another like this, I will add a tiny bit of room at the bust line but keep the waist as is.
The shoes are Aerosoles Paperback in pewter.
The Lady and the Unicorn Desire Gown
I was going through some old photos and found some of the costumes I've made over the years. The over gown is made from red linen with white satin detailing at the neckline as well as the upper arms above the chiffon sleeves. I used various trims throughout. The chemise is bronze silk with wide passementarie trim along the cuffs and lower edge.
This ensemble was inspired by The Lady and the Unicorn Desire tapestry.

image from Wikipedia
I found a drawing of this gown in the book Medieval Costume in England and France: The 13th, 14th and 15th Centuries by Mary G. Houston and adapted patterns from Patterns for Theatrical Costumes: Garments, Trims, and Accessories from Ancient Egypt to 1915 by Katherine Strand Holkeboer to create it.


The drawing captures the detailing beautifully.

The over gown has two long slits on the sides. It can be worn gathered into a belt to show the silk chemise underneath. The gown itself has no boning, and corsetry wasn't indicative of the times, but I like the look of a clean line at the bodice so I've worn one underneath.
The hat is made from McCall's 4806. It's been awhile since I made this outfit. I didn't change the pattern, but I remember adding steps to the construction based on my millinery experience. I used the same silk as the chemise and white satin from the dress.

This photo was taken at the Stronghold Olde English Faire.
It's a wonderful property that holds a faire every autumn, including tours of the Tudor revival mansion and tractor-pulled hayrides. My friend does a wonderful presentation called A Knight to Remember -- definitely a must-see! :D
Buttercream Beaded Dress
I've been in love with this dress from The Cat's Meow in Toronto since I first saw it last summer. Sadly, it is out of my price range, even though the boutique does offer layaway plans. I'd likely have to have it altered, too, since it is a size larger than I normally wear. :\

The boutique has a blog that features accessories as well as the fabulous window arrangements where I first saw this beautiful dress. I warn you - you will get lost in all the lovely vintage fashion. :D
The original dress is apparently a golden taupe, but I like the idea of a rich buttercream satin base. I've done some beadwork in the past but nothing freehand or this extensive. I'll have to dig out some photos of my Tudor gown to show you the beadwork on the skirt and sleeves.
Steampunk Holiday, part 8
The final part of the Steampunk Holiday ensemble is the jacket with faux vest.

I altered Simplicity 2172 to make the jacket - changing the front slightly and cropping a lot of the length. I also omitted the shoulder detailing, cuffs, pocket welts and back lacing.

I made a quick mockup of cotton fabric to test the fit and help with the front alteration. I altered the front pattern piece with the vest portion by cutting off the lower piece that attaches to the side front. I made a straight size 6, adding 3/8" to the front edge of the vest for a better fit over the corset.

I eliminated the pocket welts by using lining pattern piece 10 for the side front. This substitution and the omission of the back lacing cut down a lot of time in construction. I lined the chocolate velvet vest insert with brown satin and constructed each piece separate from the coat. I put the buttonholes in at this time since it's easier to work with a small piece.

When it came time to sewing in the lining, I basted the vest fronts to the jacket beforehand. This gives a more realistic impression of a vest under a jacket.

The rest of the jacket has charcoal and light grey polka dot satin lining. :D

To finish the outer edge, I added grey-brown Venise lace. I didn't limit the lace to the neckline but added it all the way around the suiting portion of the jacket.

The whole ensemble...

From the back...

The party was great fun with good food and good conversation. :]


